WooCommerce Checkout Fields & Fees
Updated on: April 16, 2024
Version 10.8
Single Purchase
Buy this product once and own it forever.
Membership
Unlock everything on the site for one low price.
Product Overview
Enhance your WooCommerce checkout process with the powerful "WooCommerce Checkout Fields & Fees" plugin. This tool allows you to customize the fields in your checkout form, making it easier for your customers to provide the information you need. Plus, you can add additional fees based on the fields filled out, creating a more tailored shopping experience. With a user-friendly interface, adjusting your checkout setup is straightforward and efficient. Whether you want to collect extra details or apply conditional fees, this plugin has you covered. It's a must-have for any store aiming to optimize their checkout flow.
Key Features
- Customize checkout fields to gather specific customer information.
- Add conditional fees based on user selections for a tailored experience.
- Easy-to-use interface for quick adjustments without coding.
- Enable or disable fields as needed to streamline the checkout process.
- Supports multiple field types, including text, dropdowns, and checkboxes.
- Fully compatible with popular payment gateways.
- Responsive design ensures a seamless experience on all devices.
- Regular updates and dedicated support to keep your checkout optimized.
Installation & Usage Guide
What You'll Need
- After downloading from our website, first unzip the file. Inside, you may find extra items like templates or documentation. Make sure to use the correct plugin/theme file when installing.
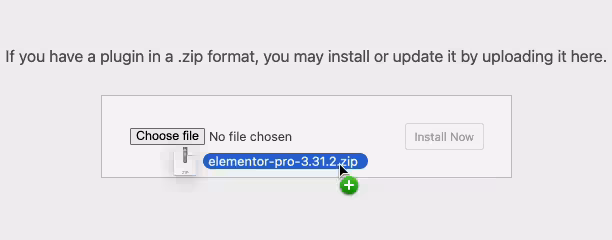
Unzip the Plugin File
Find the plugin's .zip file on your computer. Right-click and extract its contents to a new folder.

Upload the Plugin Folder
Navigate to the wp-content/plugins folder on your website's side. Then, drag and drop the unzipped plugin folder from your computer into this directory.
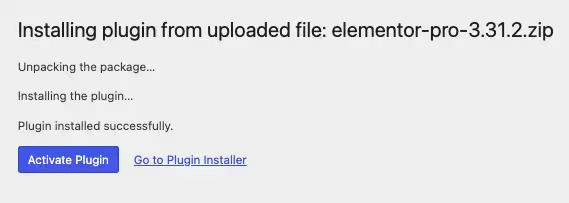
Activate the Plugin
Finally, log in to your WordPress dashboard. Go to the Plugins menu. You should see your new plugin listed. Click Activate to finish the installation.
PureGPL ensures you have all the tools and support you need for seamless installations and updates!
For any installation or technical-related queries, Please contact via Live Chat or Support Ticket.