Changelog
Total Products – 20704

Woocommerce | Address Field Autocomplete

star star star star star_half 4.5/5 based on 100 reviews
schedule

Updated on: November 25, 2024

code

Version 1.2.0

Woocommerce | Address Field Autocomplete
GPL License
VirusTotal Scan: View Report
Updated On: November 25, 2024
Version: 1.2.0
Downloads: 12
Status: verified_user Secure & Clean
Have a problem? bug_report Report Click here to report any issues with the product.

Single Purchase

Buy this product once and own it forever.

$ 3.49

Membership

Unlock everything on the site for one low price.

$ 16 / month SAVE 90%

Product Overview

About Woocommerce | Address Field Autocomplete

Introduction

For any online store, a smooth and seamless checkout process is essential in order to provide a positive shopping experience for customers. One common area where many e-commerce sites could improve is the address field autocomplete feature. This feature can help speed up the checkout process by providing suggestions for customers as they type in their address, reducing the risk of spelling errors and ensuring accurate delivery information. In this blog post, we will explore how to implement address field autocomplete in Woocommerce, one of the most popular e-commerce platforms.

Why Address Field Autocomplete is Important

Address field autocomplete is a feature that automatically suggests complete addresses as users type in the address field. This can be a major time-saver for customers, especially on mobile devices where typing can be cumbersome. By providing suggestions, autocomplete can help customers complete the checkout process faster, leading to higher conversion rates and lower cart abandonment rates. Additionally, autocomplete can reduce the risk of address errors, which can lead to delivery delays and customer dissatisfaction. Overall, implementing address field autocomplete can greatly improve the user experience on your e-commerce site.

How to Implement Address Field Autocomplete in Woocommerce

There are several ways to add address field autocomplete to your Woocommerce store. One popular option is to use a plugin such as "Address Autocomplete for Woocommerce." This plugin integrates with Google Places API to provide accurate address suggestions as users type. To install the plugin, simply go to your Wordpress dashboard, navigate to the plugins section, and search for "Address Autocomplete for Woocommerce." Install and activate the plugin, then configure the settings to customize the autocomplete behavior to your liking.

Tips for Optimizing Address Field Autocomplete

While implementing address field autocomplete can greatly improve the user experience on your e-commerce site, there are a few best practices to keep in mind to optimize the feature:

  • Ensure the autocomplete suggestions are accurate and up-to-date by regularly updating the address database.
  • Customize the autocomplete behavior to match your target audience's preferences and location.
  • Consider adding additional fields such as apartment number or suite number to further streamline the checkout process.
  • Test the autocomplete feature thoroughly to identify and fix any bugs or issues that may arise.

Conclusion

Address field autocomplete is a powerful feature that can greatly improve the checkout experience for customers on your Woocommerce store. By providing accurate address suggestions as users type, you can help streamline the checkout process, reduce errors, and ultimately increase conversions. Whether you choose to implement a plugin or develop a custom solution, address field autocomplete is a valuable addition to any e-commerce site looking to enhance the user experience. We hope this blog post has provided you with a comprehensive overview of address field autocomplete in Woocommerce and the benefits it can bring to your online store.

Installation & Usage Guide

What You'll Need

  • After downloading from our website, first unzip the file. Inside, you may find extra items like templates or documentation. Make sure to use the correct plugin/theme file when installing.
1

Unzip the Plugin File

Find the plugin's .zip file on your computer. Right-click and extract its contents to a new folder.

Image showing how to unzip a file
2

Upload the Plugin Folder

Navigate to the wp-content/plugins folder on your website's side. Then, drag and drop the unzipped plugin folder from your computer into this directory.
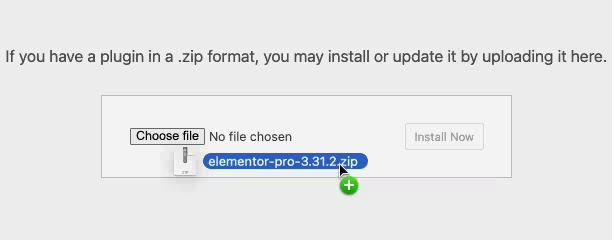
Image of dragging and dropping the plugin folder
3

Activate the Plugin

Finally, log in to your WordPress dashboard. Go to the Plugins menu. You should see your new plugin listed. Click Activate to finish the installation.
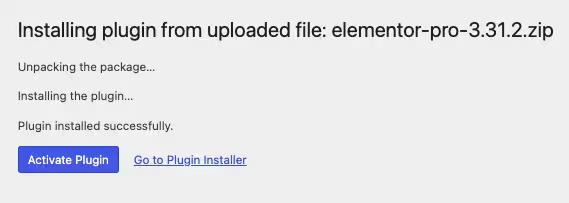
Image of the WordPress plugins page with the activate button highlighted

PureGPL ensures you have all the tools and support you need for seamless installations and updates!

For any installation or technical-related queries, Please contact via Live Chat or Support Ticket.