Changelog
Total Products – 20704

JetFormBuilder Formless Actions Endpoints

star star star star star_half 4.5/5 based on 100 reviews
schedule

Updated on: July 22, 2024

code

Version 1.0.2

JetFormBuilder Formless Actions Endpoints
GPL License
VirusTotal Scan: View Report
Updated On: July 22, 2024
Version: 1.0.2
Downloads: 12
Status: verified_user Secure & Clean
Have a problem? bug_report Report Click here to report any issues with the product.

Single Purchase

Buy this product once and own it forever.

$ 3.49

Membership

Unlock everything on the site for one low price.

$ 16 / month SAVE 90%

Product Overview

About JetFormBuilder Formless Actions Endpoints

Introduction

JetFormBuilder Formless Actions Endpoints allow users to trigger specific actions without the need for an actual form submission. This feature provides a more dynamic and efficient way to perform tasks on a website or web application.

Overview of Formless Actions Endpoints

With JetFormBuilder Formless Actions Endpoints, users can define custom actions such as sending emails, updating database records, or performing any other operation without requiring the user to fill out a form. This can be particularly helpful in scenarios where immediate actions need to be taken based on user interactions or events on a website.

How to Implement Formless Actions Endpoints

Implementing Formless Actions Endpoints in JetFormBuilder is a straightforward process. Users can define the specific actions they want to trigger and assign them to a designated endpoint. This endpoint can then be called programmatically or through an event trigger on the website.

Benefits of Using Formless Actions Endpoints

There are several benefits to using Formless Actions Endpoints in JetFormBuilder. Some of the key advantages include:

  • Efficiency: Perform actions without the need for form submissions, saving time and streamlining processes.
  • Flexibility: Define custom actions based on specific user interactions or events on the website.
  • Automation: Automate tasks such as sending notifications or updating records without manual intervention.
  • Enhanced User Experience: Provide a more seamless and interactive experience for users by triggering actions instantly.

Use Cases for Formless Actions Endpoints

Formless Actions Endpoints can be utilized in various scenarios to enhance website functionality and user experience. Some common use cases include:

  • Instant Email Notifications: Send email notifications to users or administrators based on specific triggers without the need for a form submission.
  • Real-Time Data Updates: Update database records or display dynamic content on the website in response to user interactions.
  • Automated Processes: Perform automated tasks such as scheduling appointments, generating reports, or processing payments seamlessly.
  • Interactive Elements: Create interactive elements on the website that respond to user inputs or events without reloading the page.

Conclusion

JetFormBuilder Formless Actions Endpoints provide a powerful tool for implementing dynamic and interactive features on a website. By allowing users to trigger specific actions without the need for form submissions, this feature enhances efficiency, flexibility, and automation capabilities. Whether it's sending email notifications, updating database records, or performing other tasks, Formless Actions Endpoints offer a seamless way to enhance the user experience and streamline website operations.

Installation & Usage Guide

What You'll Need

  • After downloading from our website, first unzip the file. Inside, you may find extra items like templates or documentation. Make sure to use the correct plugin/theme file when installing.
1

Unzip the Plugin File

Find the plugin's .zip file on your computer. Right-click and extract its contents to a new folder.

Image showing how to unzip a file
2

Upload the Plugin Folder

Navigate to the wp-content/plugins folder on your website's side. Then, drag and drop the unzipped plugin folder from your computer into this directory.
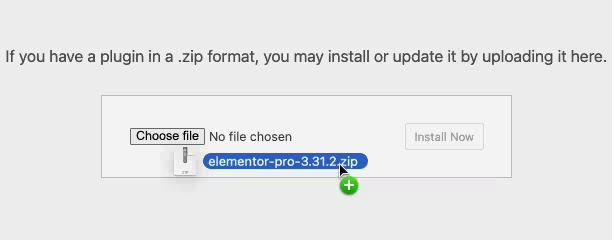
Image of dragging and dropping the plugin folder
3

Activate the Plugin

Finally, log in to your WordPress dashboard. Go to the Plugins menu. You should see your new plugin listed. Click Activate to finish the installation.
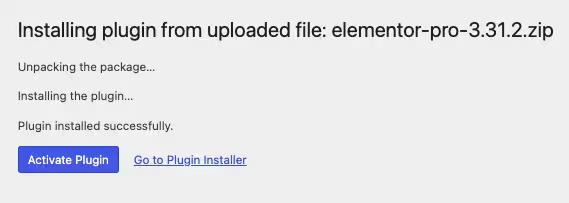
Image of the WordPress plugins page with the activate button highlighted

PureGPL ensures you have all the tools and support you need for seamless installations and updates!

For any installation or technical-related queries, Please contact via Live Chat or Support Ticket.