Changelog
Total Products – 20704

Bookingpress | ECPay Payment Gateway Addon

star star star star star_half 4.5/5 based on 100 reviews
schedule

Updated on: May 23, 2025

code

Version 1.1

Bookingpress | ECPay Payment Gateway Addon
GPL License
VirusTotal Scan: View Report
Updated On: May 23, 2025
Version: 1.1
Downloads: 12
Status: verified_user Secure & Clean
Have a problem? bug_report Report Click here to report any issues with the product.

Single Purchase

Buy this product once and own it forever.

$ 3.49

Membership

Unlock everything on the site for one low price.

$ 16 / month SAVE 90%

Product Overview

About Bookingpress | ECPay Payment Gateway Addon

Introduction to Bookingpress | ECPay Payment Gateway Addon

Bookingpress is a powerful WordPress plugin that allows users to create and manage booking systems for various services such as hotel rooms, appointments, and rental services. With the integration of the ECPay Payment Gateway Addon, users can now easily accept online payments for their bookings through a secure and reliable payment processor.

Key Features of Bookingpress | ECPay Payment Gateway Addon

The ECPay Payment Gateway Addon for Bookingpress comes with several key features that make it a valuable addition to any booking system. Some of the key features include:

  • Seamless Integration: The addon seamlessly integrates with the Bookingpress plugin, allowing users to easily enable ECPay as a payment option for their bookings.
  • Secure Payments: ECPay is a trusted payment processor that offers secure online transactions, giving users peace of mind when accepting payments for their services.
  • Multiple Payment Methods: ECPay supports multiple payment methods, including credit cards, bank transfers, and more, giving customers flexibility in how they pay for their bookings.
  • Real-Time Payment Processing: ECPay provides real-time payment processing, ensuring that payments are processed quickly and efficiently.

How to Setup ECPay Payment Gateway with Bookingpress

Setting up the ECPay Payment Gateway Addon with Bookingpress is a straightforward process. Users can follow these steps to configure ECPay as a payment option for their bookings:

  1. Install the ECPay Payment Gateway Addon: Users can easily install the addon through the WordPress dashboard and activate it with a valid license key.
  2. Configure ECPay Settings: Users can input their ECPay account details and enable the payment gateway within the Bookingpress plugin settings.
  3. Enable ECPay Payment Option: Once the settings are configured, users can enable ECPay as a payment option for their bookings, allowing customers to choose ECPay at checkout.
  4. Test Payments: Users can conduct test payments to ensure that the integration between Bookingpress and ECPay is functioning correctly before accepting live payments.

Benefits of Using ECPay Payment Gateway Addon with Bookingpress

There are several benefits to using the ECPay Payment Gateway Addon with Bookingpress, including:

  • Increased Payment Options: By adding ECPay as a payment gateway, users can offer customers more payment options, helping to increase conversions and sales.
  • Secure Transactions: ECPay offers secure online transactions, protecting both users and customers from fraud and unauthorized transactions.
  • Improved User Experience: By offering a seamless payment experience with ECPay, users can provide a better overall booking experience for customers.

Overall, the Bookingpress | ECPay Payment Gateway Addon provides users with a reliable and secure way to accept online payments for their bookings, enhancing the functionality and convenience of their booking system. With its key features, easy setup process, and benefits, this addon is a valuable addition for any business looking to streamline their online booking process.

Installation & Usage Guide

What You'll Need

  • After downloading from our website, first unzip the file. Inside, you may find extra items like templates or documentation. Make sure to use the correct plugin/theme file when installing.
1

Unzip the Plugin File

Find the plugin's .zip file on your computer. Right-click and extract its contents to a new folder.

Image showing how to unzip a file
2

Upload the Plugin Folder

Navigate to the wp-content/plugins folder on your website's side. Then, drag and drop the unzipped plugin folder from your computer into this directory.
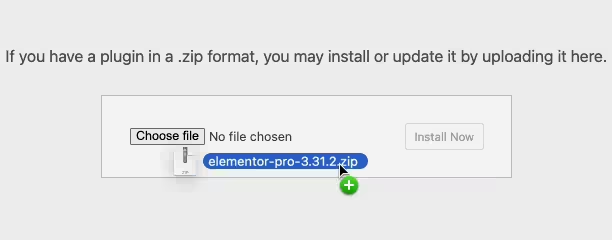
Image of dragging and dropping the plugin folder
3

Activate the Plugin

Finally, log in to your WordPress dashboard. Go to the Plugins menu. You should see your new plugin listed. Click Activate to finish the installation.
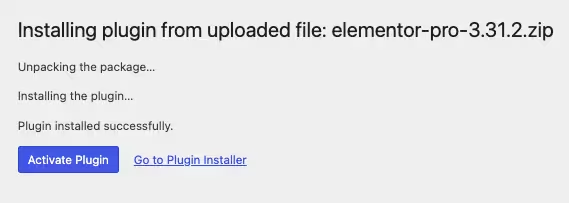
Image of the WordPress plugins page with the activate button highlighted

PureGPL ensures you have all the tools and support you need for seamless installations and updates!

For any installation or technical-related queries, Please contact via Live Chat or Support Ticket.